Shopping Cart




How to Calibrate the Altimeter and Barometer on Your Casio G-SHOCK
By :
F. Nagy -
Categories :
Watch Care & Technical Guides
Table of contents
keyboard_arrow_down
- Key Takeaways
- Understanding Casio’s Triple Sensor Technology
- The Physics of Barometric Altimetry
- How to Calibrate the Altimeter on Your G-SHOCK
- Troubleshooting Altimeter Errors
- The Barometer: Absolute vs. Relative Pressure
- When Should You Calibrate the Barometer?
- Step-by-Step Barometer Calibration
- Best Practices for Environmental Sensor Accuracy
- The Role of Temperature in Sensor Accuracy
- Exploring the Master of G and Classic Collections
- Conclusion: Trust Your Gear on Every Adventure
- References
Key Takeaways
- Frequent Calibration is Essential: Because the altimeter relies on barometric pressure, weather changes will cause altitude readings to drift. Calibrate at known elevations before and during your hike.
- Understand the Barometer: Your G-SHOCK measures absolute atmospheric pressure. Calibrating it to match a local weather station means adjusting it to display relative (sea-level) pressure.
- Triple Sensor Version 3: Modern Master of G watches utilise highly efficient sensors that are 95% smaller and significantly more accurate than previous generations.
- Temperature Compensation: For the most accurate barometric and temperature readings, remove the watch from your wrist for 15 to 30 minutes to eliminate body heat interference.
For outdoor adventurers, mountaineers, and tactical professionals, a reliable wrist instrument is far more than a simple timekeeper; it is a vital piece of survival gear. Among the most respected tools in this category are the timepieces equipped with the legendary Casio Triple Sensor technology. These watches provide critical environmental data—altitude, barometric pressure, and compass bearing—directly to your wrist, allowing you to navigate harsh terrains and anticipate sudden weather shifts.
However, even the most advanced horological instruments require human input to maintain peak accuracy. A common point of confusion among new owners of ABC (Altimeter, Barometer, Compass) watches is the phenomenon of sensor drift. You might wake up in your tent at the exact same location you went to sleep, only to find that your watch claims you have ascended 100 metres overnight. This is not a malfunction; it is a fundamental reality of how pressure-based altimeters function in a dynamic atmosphere.
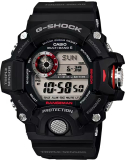
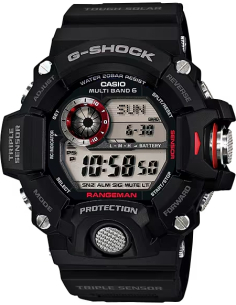
Understanding the physics behind your watch's sensors and knowing how to properly calibrate them is what separates a casual wearer from a true master of their gear. Whether you are relying on the iconic Casio G-SHOCK Rangeman GW-9400-1ER or another model from the rugged Master of G lineup, this comprehensive guide will walk you through the exact steps to calibrate your altimeter and barometer, ensuring your data is as unyielding as the watch itself.
Understanding Casio’s Triple Sensor Technology
To truly appreciate the necessity of calibration, one must first understand the mechanics housed within the resin armour of these timepieces. The heart of this capability lies in Triple Sensor Version 3, a proprietary micro-technology that revolutionised the brand's outdoor and tactical collections. Introduced to provide faster and more precise readings, this generation of sensors is 95% smaller than its predecessors while consuming significantly less power.
This efficiency is crucial because environmental sensors are notoriously power-hungry. By pairing these miniaturised sensors with the brand's proprietary Tough Solar charging system, Casio ensured that adventurers could take continuous readings without fear of draining the battery. The altimeter can measure elevation in one-metre increments, while the barometer detects pressure changes with remarkable sensitivity, plotting them on a dedicated digital graph.
As noted by horology expert Jorg Weppelink in Fratello Watches, the advanced functions of modern Master of G watches include automatic altitude calibration and settings for the altimeter, barometer, and compass,
making them some of the most complete survival tools on the market. However, while automatic calibration via Bluetooth or radio signals is available on some newer flagship models, manual calibration remains the most reliable and essential skill for anyone venturing off the grid.
The Physics of Barometric Altimetry
Why does your altimeter need calibration in the first place? The answer lies in the fact that your watch does not use GPS to determine its height above sea level. Instead, it utilises a highly sensitive pressure sensor to measure the weight of the air above you. As you climb higher, the atmospheric pressure decreases. The watch detects this drop in pressure and translates it into an altitude reading using the International Standard Atmosphere (ISA) model.
The ISA model assumes a standard temperature lapse rate and a baseline sea-level pressure of 1013.25 hPa (hectopascals). However, the Earth's atmosphere is constantly changing. When a low-pressure weather system (like a rainstorm) moves into your area, the ambient air pressure drops. Your watch's sensor feels this drop and, following its programming, assumes you have climbed to a higher elevation. This is known as altimeter drift.
The official Casio operation guide for Module 3410 explicitly states:
"Because this watch calculates altitude based on changes in atmospheric pressure, altitude readings will change as atmospheric pressure changes... To avoid this, we recommend that you calibrate the altimeter regularly."
Because of this dynamic relationship between weather and pressure, a barometric altimeter is only as accurate as its last calibration. For serious hikers, calibrating the watch at a known elevation—such as a trailhead marker, a topographical map contour line, or a summit—is a mandatory ritual before and during any expedition.
How to Calibrate the Altimeter on Your G-SHOCK
Calibrating the altimeter is a straightforward process once you understand the button layout of your specific module. The following steps are based on the widely used Module 3410, which powers the legendary Rangeman, but the logic applies to almost all digital Triple Sensor models.
Before you begin, you must know your current, exact elevation. You can find this information on a physical topographic map, a trail marker, or by checking a GPS device or smartphone app while you still have a clear signal.
Step 1: Enter the Altimeter Mode
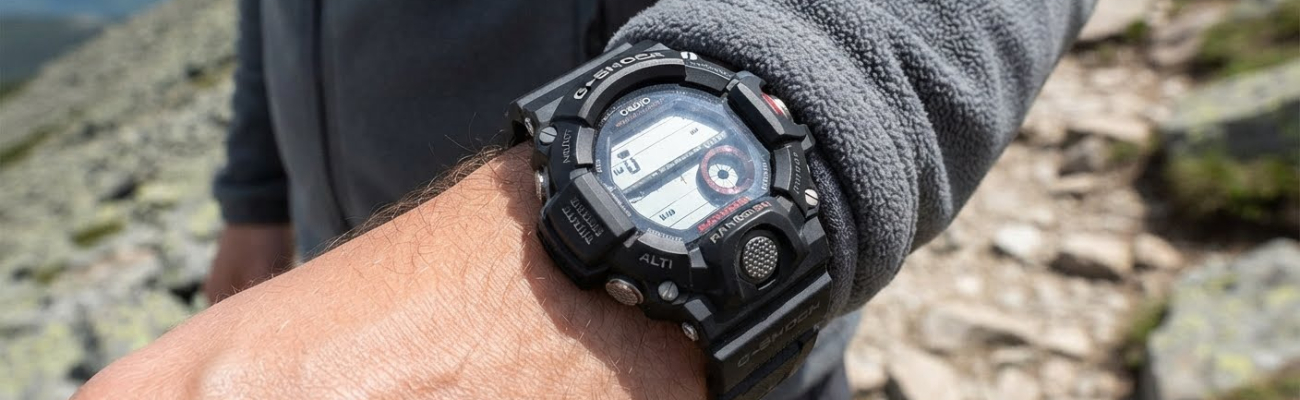
From the main Timekeeping Mode, press the dedicated sensor button. On the Rangeman, this is the large, textured metal button on the right side of the case. Pressing it once usually activates the altimeter, displaying your current (and potentially drifting) altitude.
Step 2: Enter the Setting Screen
Once in the Altimeter Mode, press and hold the 'Adjust' button (typically located at the top left of the case) for about two seconds. The altitude value on the digital display will begin to flash. This flashing indicates that the watch is now in calibration mode and is ready to receive your manual input.
Step 3: Adjust the Altitude Value
Use the buttons on the right side of the watch (often the 'Alti' and 'Comp' buttons, acting as '+' and '-') to increase or decrease the flashing value until it matches your known reference elevation. If you make a mistake or wish to return the watch to its factory default calibration, you can usually press the '+' and '-' buttons simultaneously to display "OFF", which resets the sensor to its baseline ISA calculation.
Step 4: Save and Exit
Once the correct altitude is displayed, press the 'Adjust' button one more time. The display will stop flashing, locking in your new reference point. Your altimeter is now highly accurate for your current weather conditions and is ready for the ascent.
Troubleshooting Altimeter Errors
If your watch displays "ERR" during calibration, it means the sensor has encountered a fault or the inputted value is too far outside the sensor's measurable range (typically -700 to 10,000 metres). Ensure the sensor port on the left side of the case is free of mud, dust, or debris. Rinsing the watch under clean water and using a soft brush can clear obstructions that might be skewing the pressure readings.
The Barometer: Absolute vs. Relative Pressure
While the altimeter requires frequent adjustment, the barometer is a different story. The pressure sensor inside your watch is meticulously calibrated at the factory to measure absolute atmospheric pressure. This is the actual, physical weight of the air pressing down on the watch at your exact location and elevation.
However, if you check the weather report on your local news or a smartphone app, the barometric pressure they report will almost certainly be different from what your watch displays. This is because meteorologists use relative pressure (also known as sea-level pressure). They mathematically adjust all local pressure readings as if the weather station were sitting exactly at sea level. This allows them to track high and low-pressure systems across different cities and mountain ranges without elevation skewing the data.
Because your watch measures absolute pressure, it will always read lower than the local weather station if you are above sea level. For the purpose of predicting weather in the wilderness, absolute pressure is perfectly fine. The Barometric Pressure Tendency Graph on your watch will still accurately show whether pressure is rising (improving weather) or falling (approaching storms) regardless of your altitude.
When Should You Calibrate the Barometer?
Generally, you should not calibrate the barometer unless you have a specific reason to do so. The factory calibration is highly precise. However, if you want your watch's digital display to perfectly match the relative sea-level pressure reported by your local weather station—perhaps for specific meteorological tracking or aviation purposes—you can manually offset the sensor.
Step-by-Step Barometer Calibration
If you have decided to adjust your barometer to display relative sea-level pressure, you will need a current, highly accurate reading from a local weather station or airport. Ensure the reading is fresh, as atmospheric pressure changes constantly.
Step 1: Enter the Barometer Mode
From the Timekeeping Mode, press the 'Mode' button (usually bottom left) until you reach the Barometer screen, or use the dedicated sensor button if your model allows direct access. The screen will display the current atmospheric pressure in either hPa or inHg (inches of mercury), alongside the ambient temperature.
Step 2: Enter the Setting Screen
Just as with the altimeter, press and hold the 'Adjust' button (top left) until the pressure value begins to flash. You are now in the barometer calibration mode.
Step 3: Adjust the Pressure Value
Use the right-side buttons ('+' and '-') to change the flashing value until it matches the relative pressure reported by your local weather station. Again, if you wish to undo this in the future and return to the factory absolute pressure calibration, press both the '+' and '-' buttons simultaneously until "OFF" appears.
Step 4: Save and Exit
Press the 'Adjust' button to lock in the new value. The display will stop flashing, and your watch will now display relative sea-level pressure based on your manual offset.
Best Practices for Environmental Sensor Accuracy
Owning a high-end tactical timepiece requires a bit of operational knowledge to get the most out of its features. Beyond simple calibration, there are several best practices you should follow to ensure your environmental data is as accurate as possible.
The Role of Temperature in Sensor Accuracy
Your watch features a built-in thermometer, which is primarily used by the internal microcomputer to perform temperature compensation for the pressure sensor. However, when the watch is strapped to your wrist, it absorbs your body heat. If you are hiking in 10°C (50°F) weather, your watch might display an ambient temperature of 26°C (79°F) because of your skin temperature.
To get an accurate reading of the outside air temperature, you must remove the watch from your wrist, wipe off any sweat, and place it in a shaded, well-ventilated area for 15 to 30 minutes. Once the watch has acclimated to the ambient environment, the thermometer will provide a highly precise reading, which in turn ensures the utmost accuracy for the barometric calculations.
Furthermore, always utilise the Barometric Pressure Tendency Alarm if your model supports it. This feature monitors the pressure graph in the background and will emit a loud beep and display an arrow indicator if it detects a sudden, steep drop in pressure. In the backcountry, this alarm is your early warning system for severe weather, giving you time to pitch a tent or find shelter before a storm hits.
Exploring the Master of G and Classic Collections
While the ability to calibrate altimeters and track barometric pressure is essential for mountaineers, Casio understands that not every watch enthusiast requires a full suite of ABC sensors for their daily routine. For those who demand the legendary shock resistance, 200-metre water resistance, and bold aesthetics of the brand without the need for environmental tracking, the G-Shock PRO and Classic collections offer an incredible array of options.
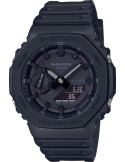
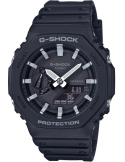
One of the most celebrated designs in recent horological history is the GA-2100 series, affectionately dubbed the "CasiOak" by enthusiasts due to its distinctive octagonal bezel. This line strips away the bulky sensors in favour of a sleek, minimalist profile that fits effortlessly under a shirt cuff while retaining absolute toughness. The Casio G-SHOCK Classic GA-2100-1A1ER offers a stealthy, all-black tactical aesthetic, while the Casio G-SHOCK Classic GA-2100-1AER provides high-contrast white indices for superior legibility.
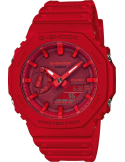
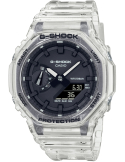
For those who prefer a pop of colour in their everyday carry, the vibrant red Casio G-SHOCK Classic GA-2100-4AER makes a bold statement. Alternatively, the transparent resin of the Casio G-SHOCK Classic GA-2100SKE-7AER taps into the popular skeletonised trend, offering a futuristic take on the classic octagonal form.
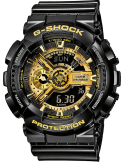
If you prefer the oversized, hyper-complex dials that defined the brand's aesthetic in the 2010s, the Casio G-SHOCK Classic GA-110GB-1AER combines a massive resin case with striking black and gold accents. It is a testament to the fact that whether you are tracking atmospheric pressure on a mountain peak or navigating the urban jungle, there is a G-SHOCK perfectly tailored to your environment.
Conclusion: Trust Your Gear on Every Adventure
A tool is only as effective as the person wielding it. By taking the time to understand the physics of barometric altimetry and mastering the calibration process of your Triple Sensor Version 3 module, you elevate your watch from a simple accessory to a trusted survival instrument. Knowing how to adjust for altimeter drift and interpret absolute versus relative pressure ensures that when the weather turns and visibility drops, the data on your wrist remains an anchor of truth.
Whether you are preparing for a multi-day trek with the uncompromising Casio G-SHOCK Rangeman GW-9400-1ER or simply looking to upgrade your daily rotation with a rugged classic, having the right gear is the first step of any successful journey. We invite you to explore our curated selection of tactical and outdoor timepieces at WatchExclusive, where horological toughness meets uncompromising precision. Equip yourself with the best, calibrate your sensors, and step confidently into the wild.
References
- Weppelink, Jorg. Hands-On: The G-Shock Master Of G Mudmaster GWG-B1000 Is Nothing Short Of Impressive. Fratello Watches, March 2024.
- Casio Computer Co., Ltd. Operation Guide 3410 (GW-9400 Rangeman). Official Casio Support Archive.
- Stolk, Lex. Hands-On With The Completely Redesigned Casio G-Shock Mudman Range. Fratello Watches, July 2023.
Share this content